NES Toploader AV Mod – Reassembly
To jump between posts in this series, please visit the NES Mod Index.
Now it’s time to put it all back together. This process is a lot like taking it apart, only backwards.
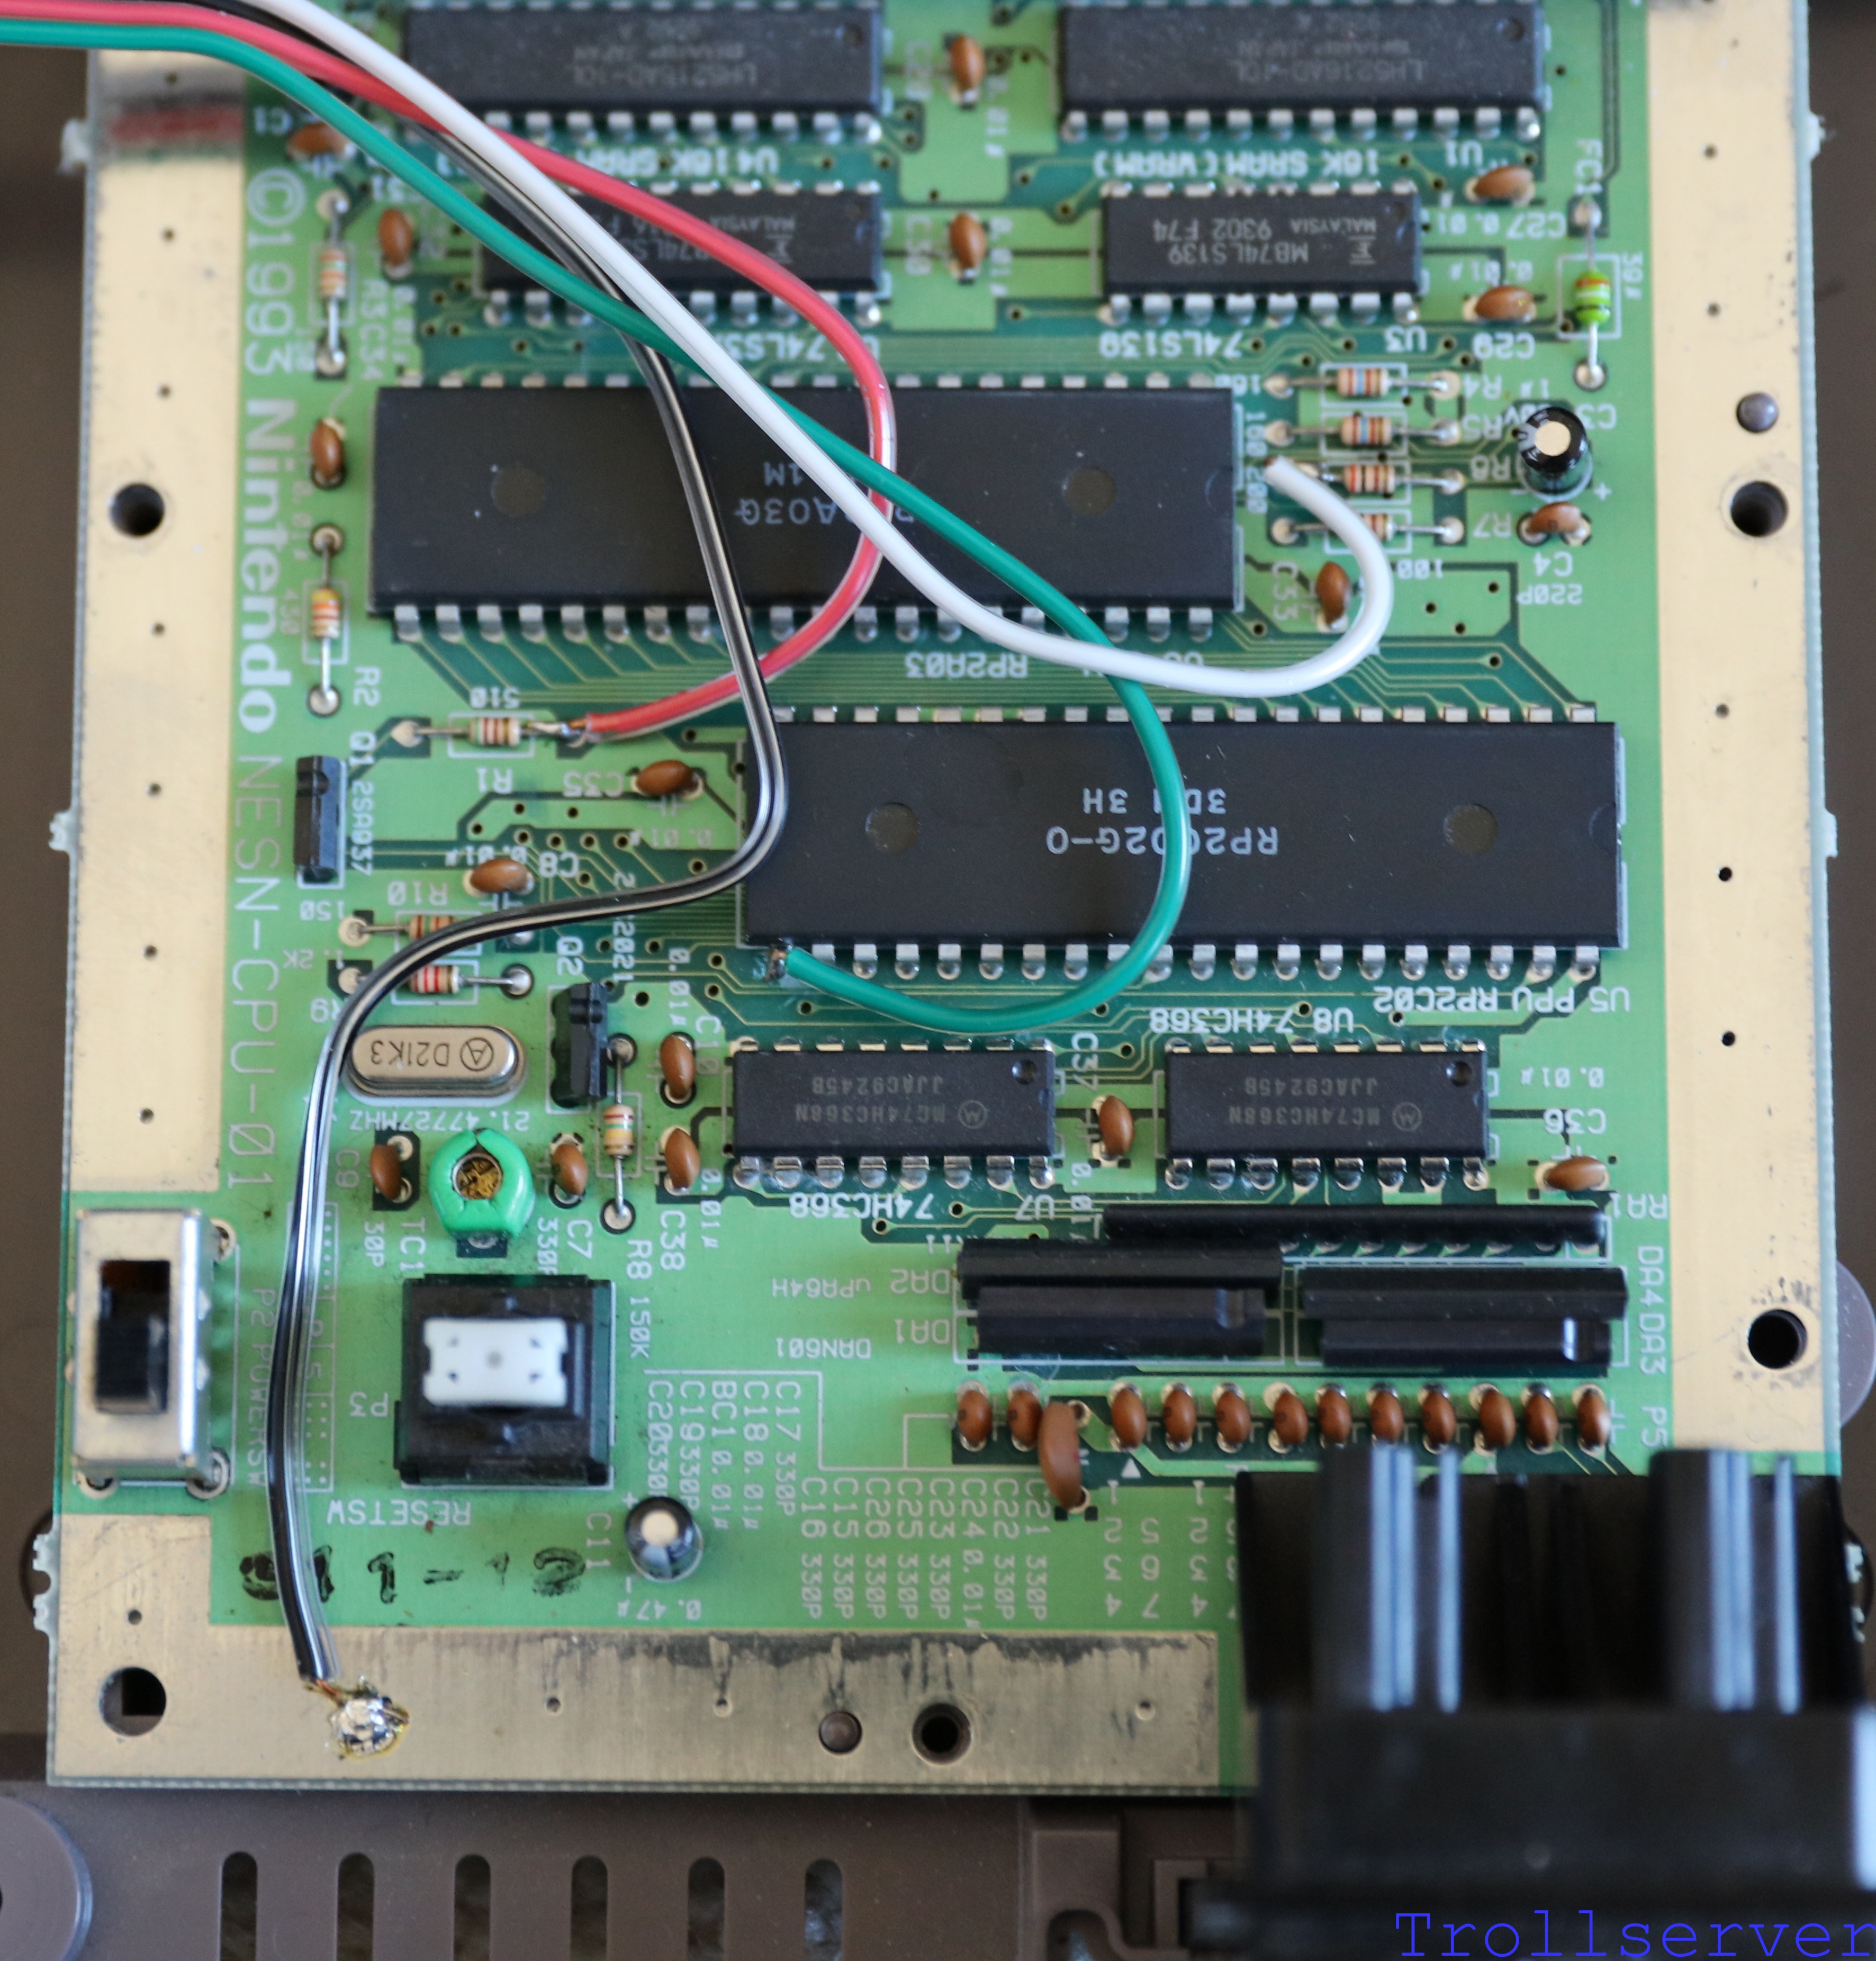
Step 1 – Carefully Flatten The Input Wires
If you are like me, you’ve soldered your wires to the NES Motherboard and did no further messing with them before you tried it out. That probably means your wires have no hope of fitting under the motherboard shield without a bit of work. Gently flatten the wires so they are closer to the NES Motherboard and sort of go between components. It doesn’t have to be perfect because the motherboard shield has quite a bit of clearance. It should look a bit like this when you are done.
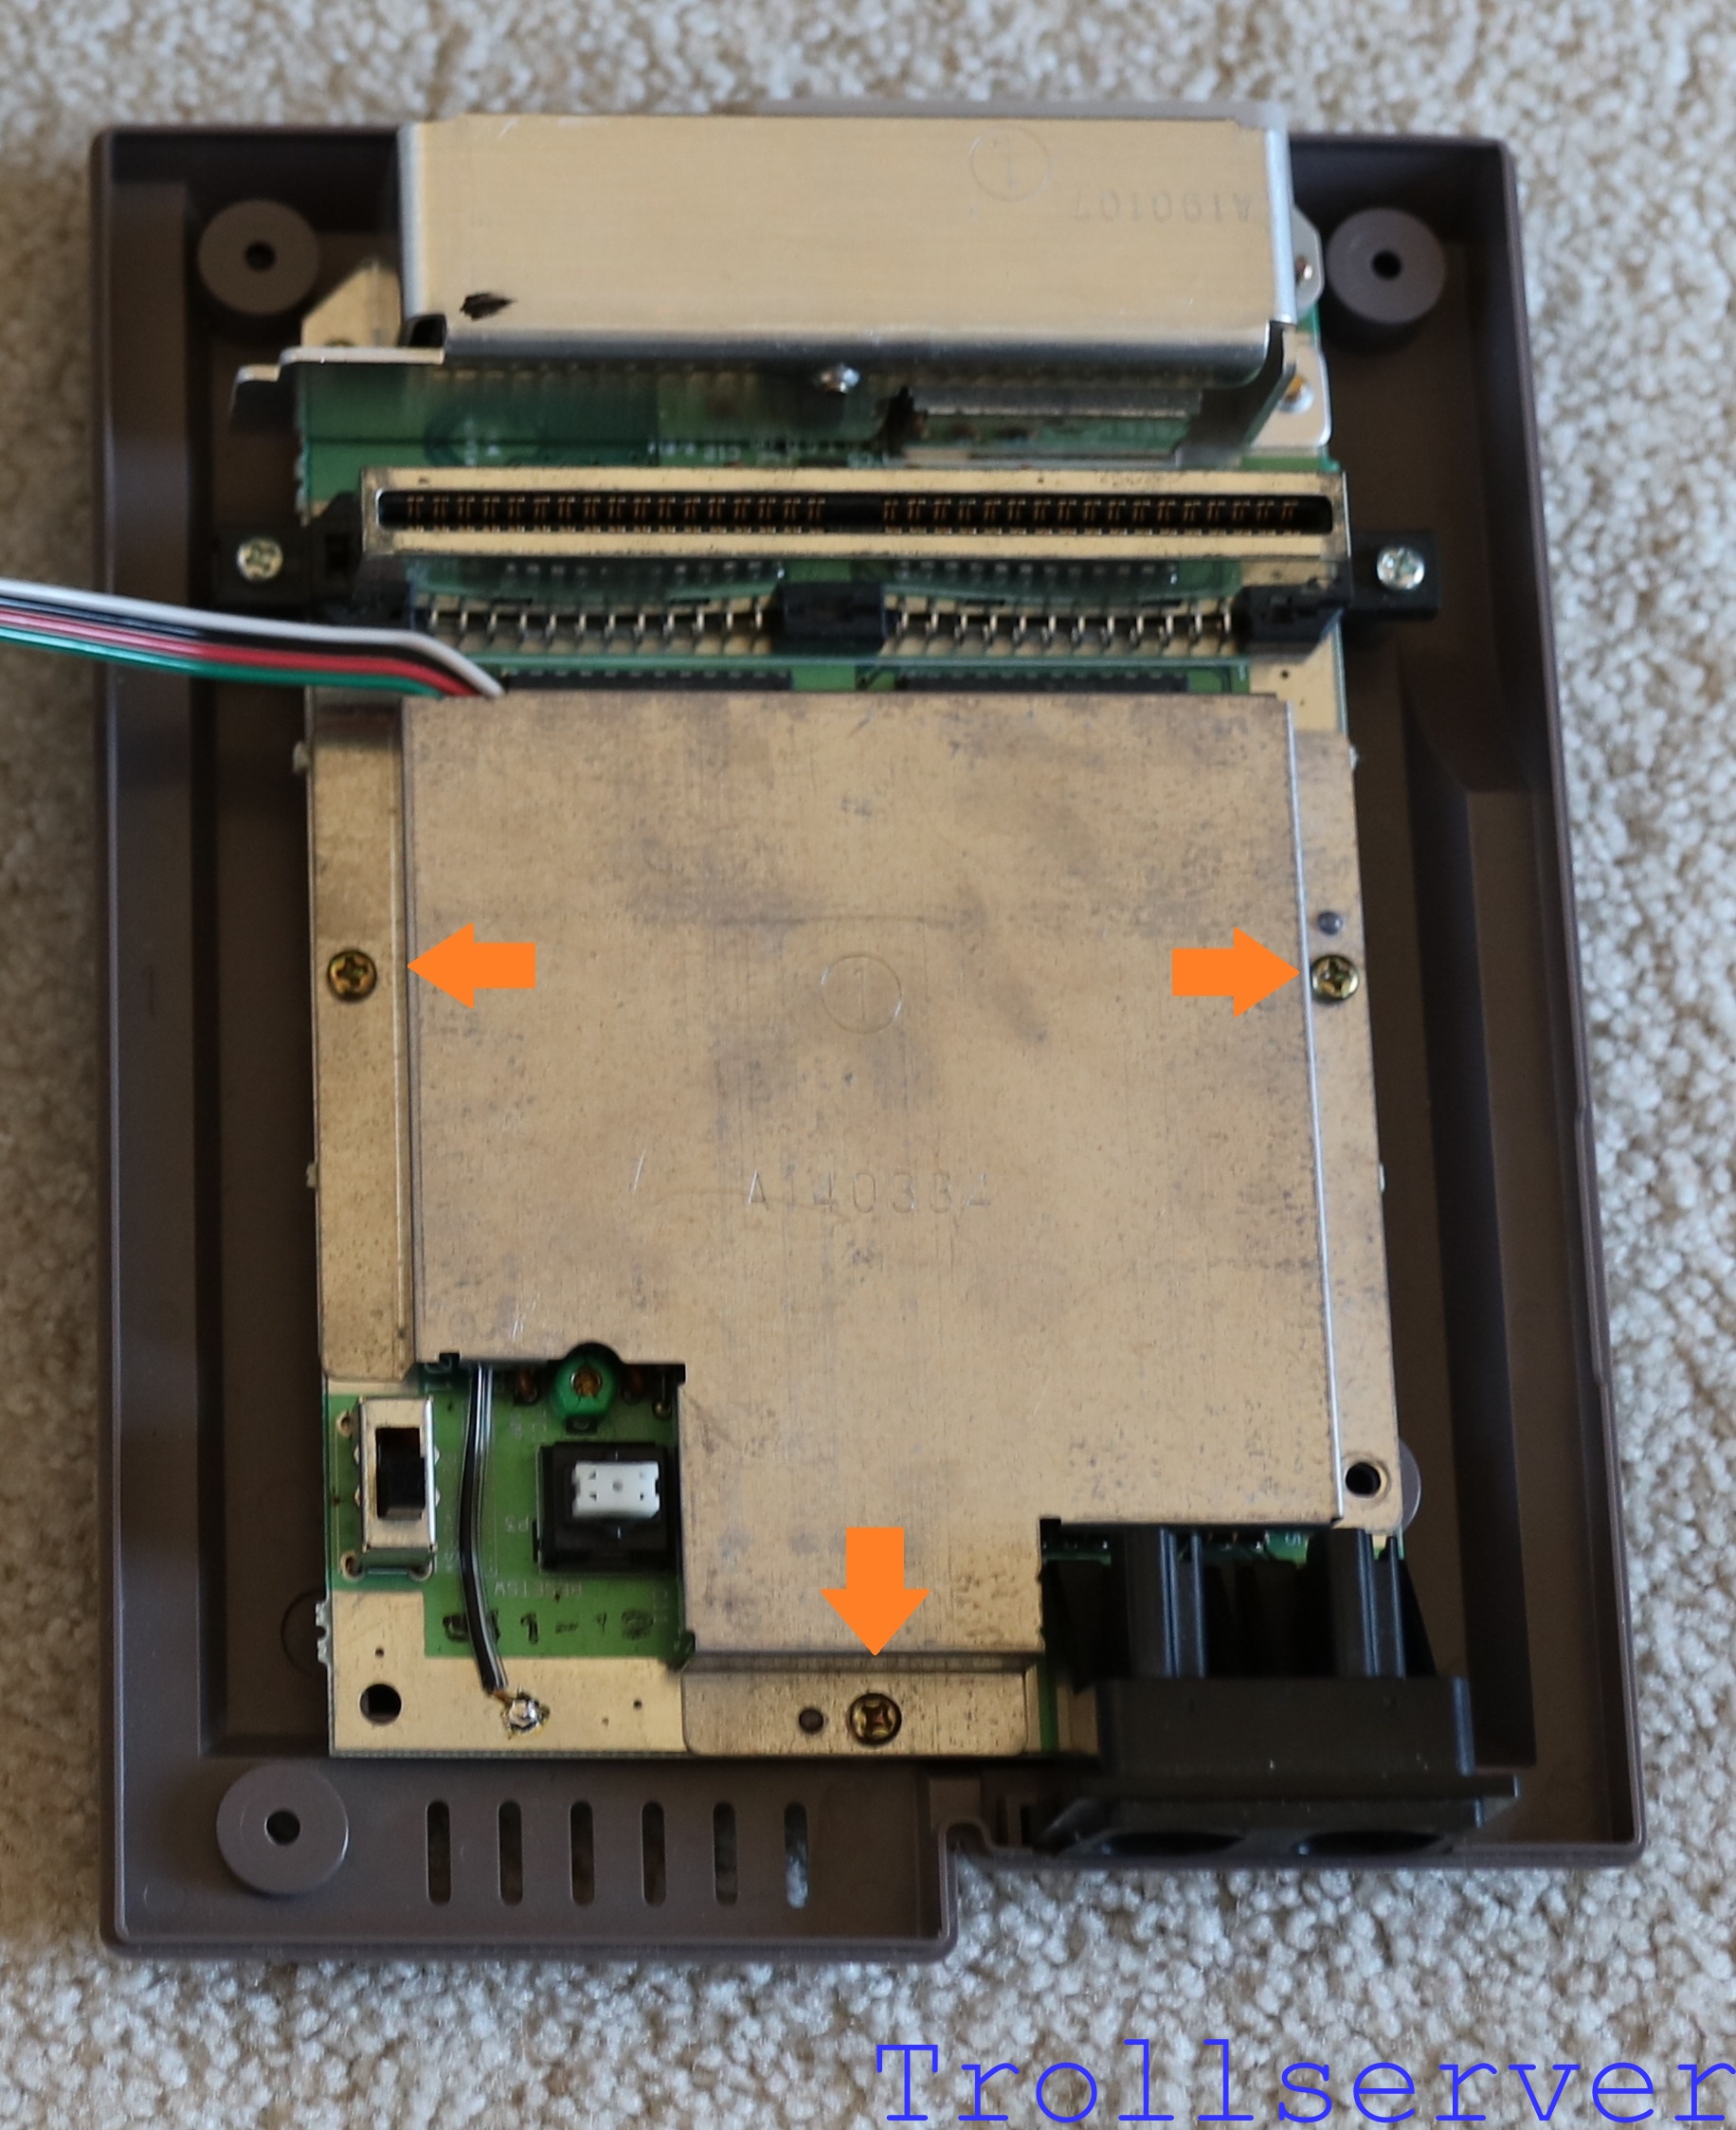
Step 2 – Put the Motherboard Shield Back On
Once your input wires are sufficiently flattened, you need to put the motherboard shield back on. It uses the 3 Phillips head screws. You may not have noticed when you removed the shield that there were actually 4 holes even though there were only 3 screws. I’ve labeled the holes that need the screws in them with orange arrows to remind you where they go.
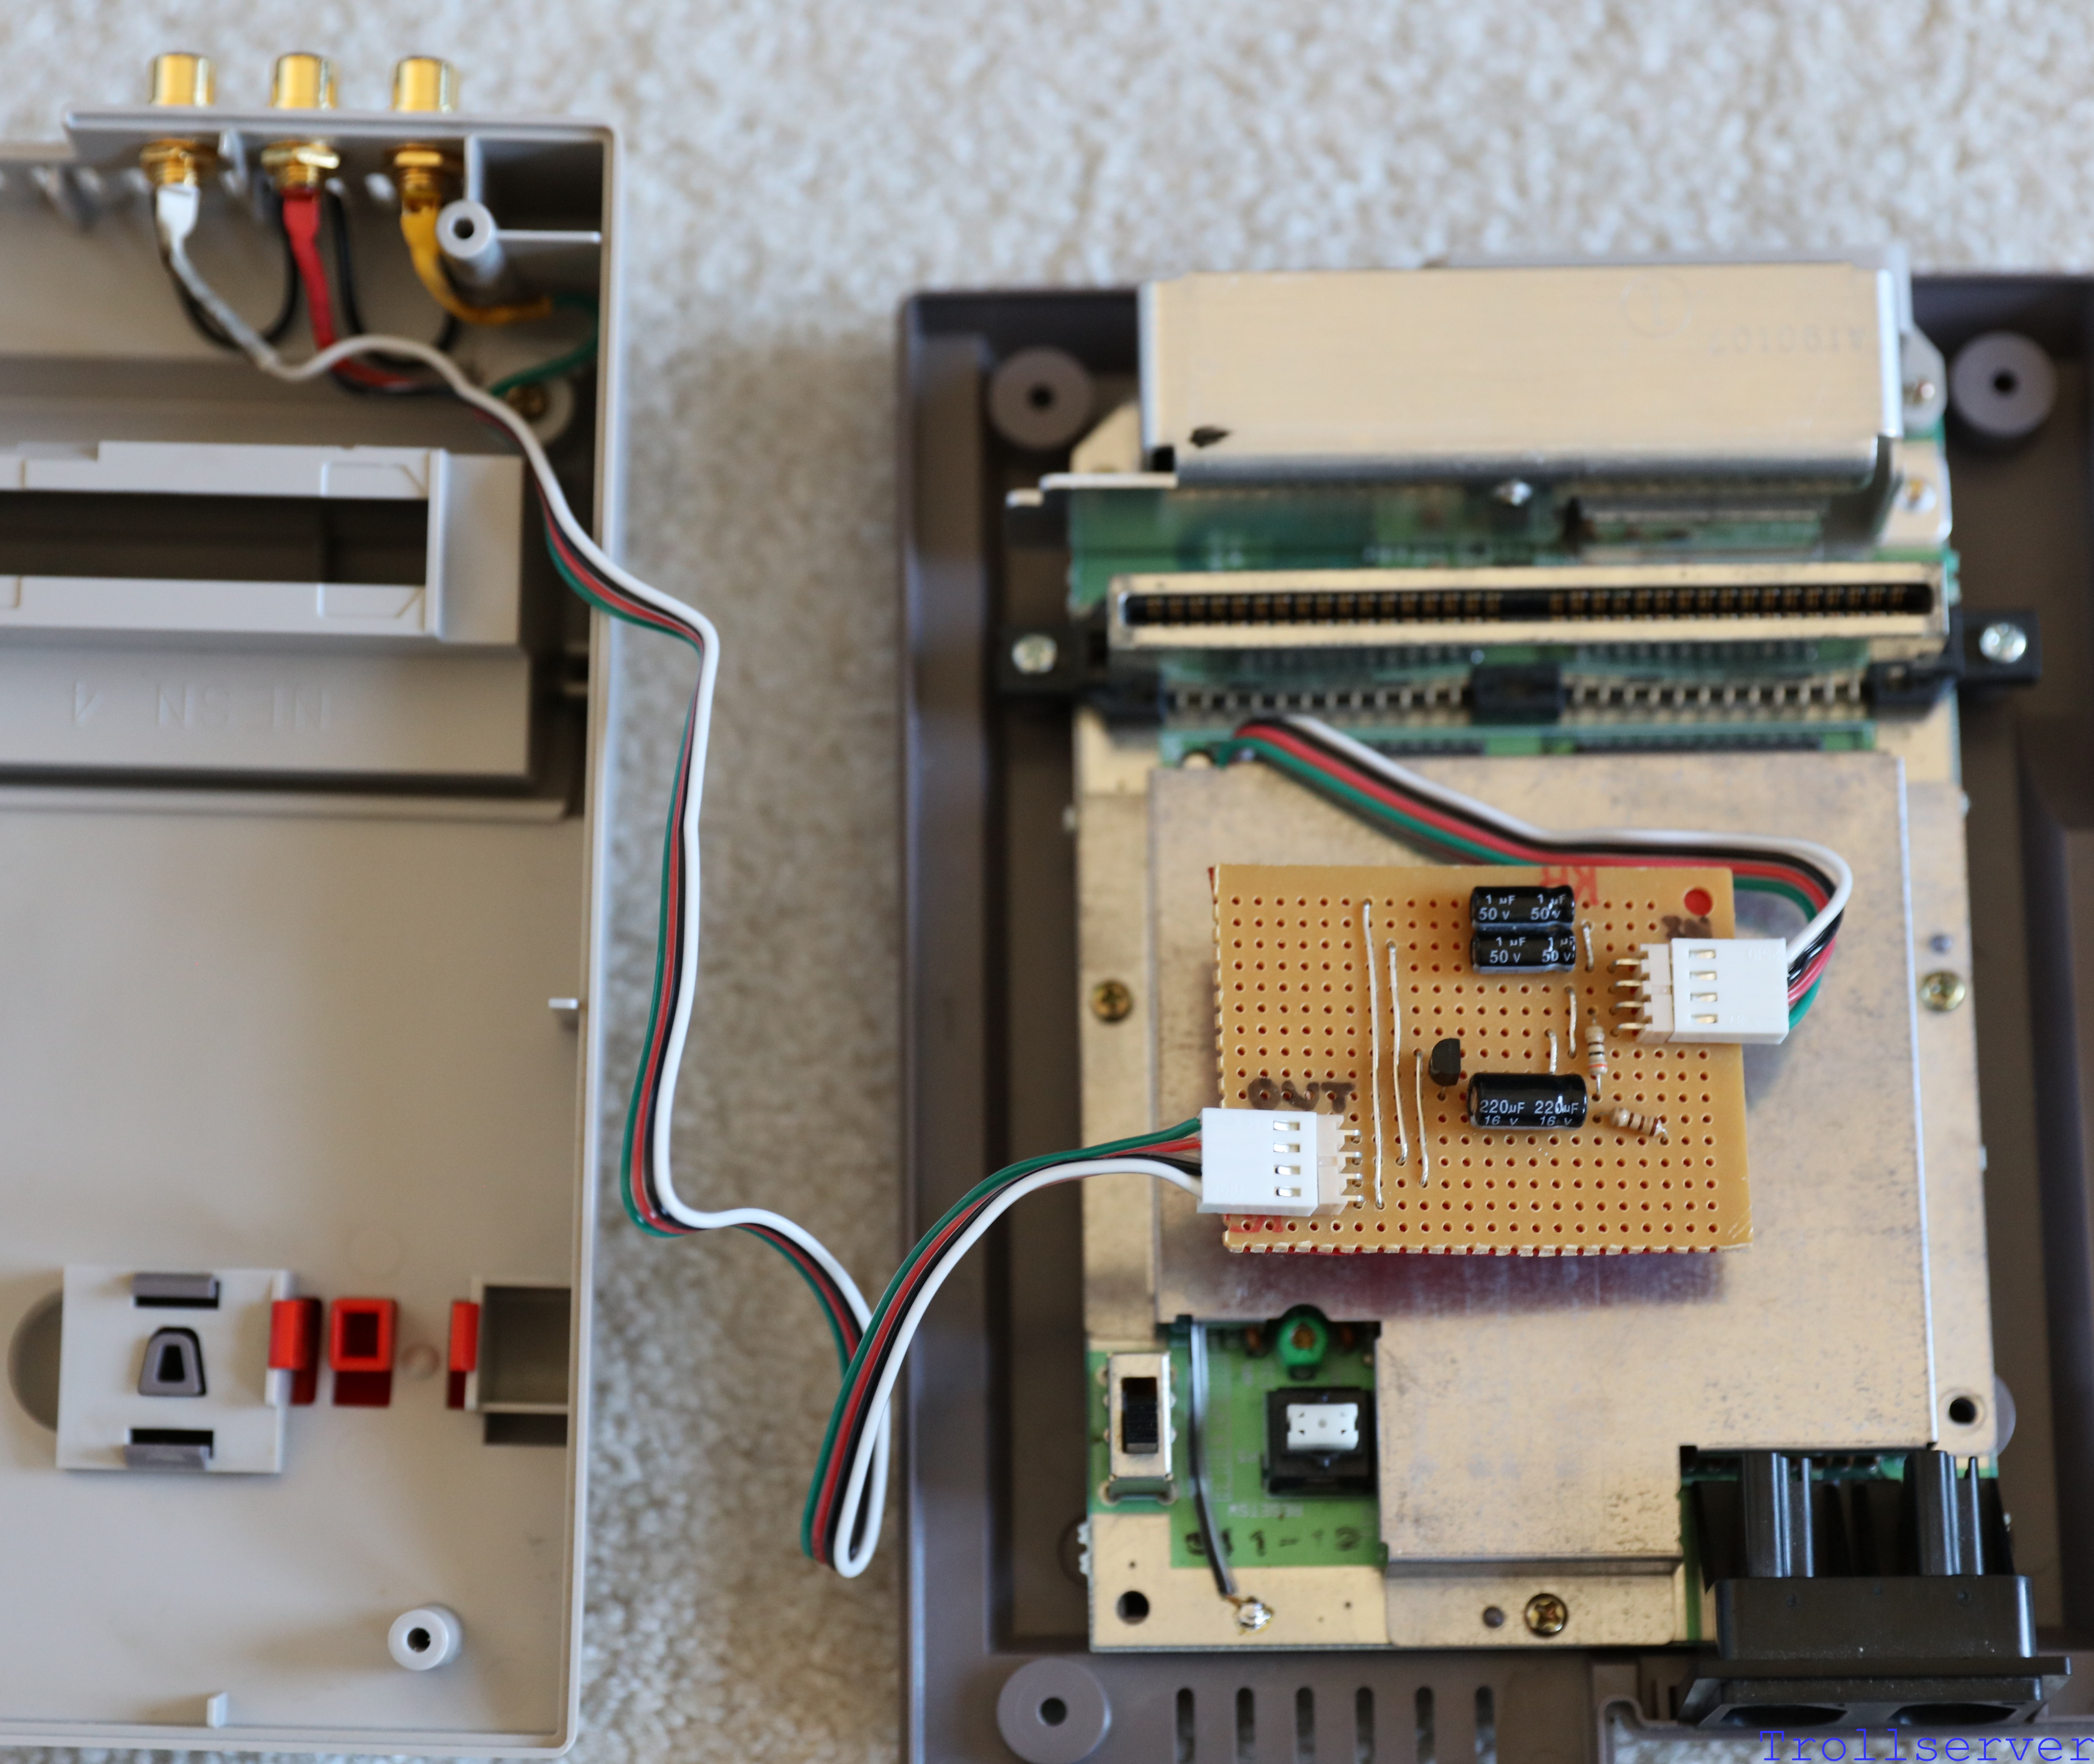
Step 3 – Connect and Position the Circuit Board
This step may already be partially complete if you did the Smoke Test as described in the previous post, but I will describe it anyway.
- Connect the wire that’s coming out from under the motherboard shield to the Input side of the circuit board.
- Connect the wire that goes over to your RCA jacks to the Output side of the circuit board.
- Carefully bend and twist the wires until they have the circuit board sitting comfortably near the middle of the motherboard shield.
- Double check that the spot where the input wires come around the shield is not pressed up against the cartridge slot. It will make both closing the NES and inserting cartridges difficult if it’s left that way.
Step 4 – Close the NES
Now with things mostly in the right places, it’s really time to close it all up again. This process can take a little time and be a bit of a pain because there is obviously more stuff in the NES than it left the factory with. Be particularly careful getting the Heat Shield around the backs of your RCA jacks. Just keep working it closer together and poking things back into place through the gap until everything is in there, nothing is blocked, and you can hold it closed without a lot of pressure.
Once you have everything lined up, flip the whole thing over and put the 4 case screws back in to hold it closed. These are the screws that are the funny security style. I haven’t provided a picture for where they go because there are 4 screws and 4 holes and by this point of the process I’m pretty sure you’ve got this one on your own. 🙂
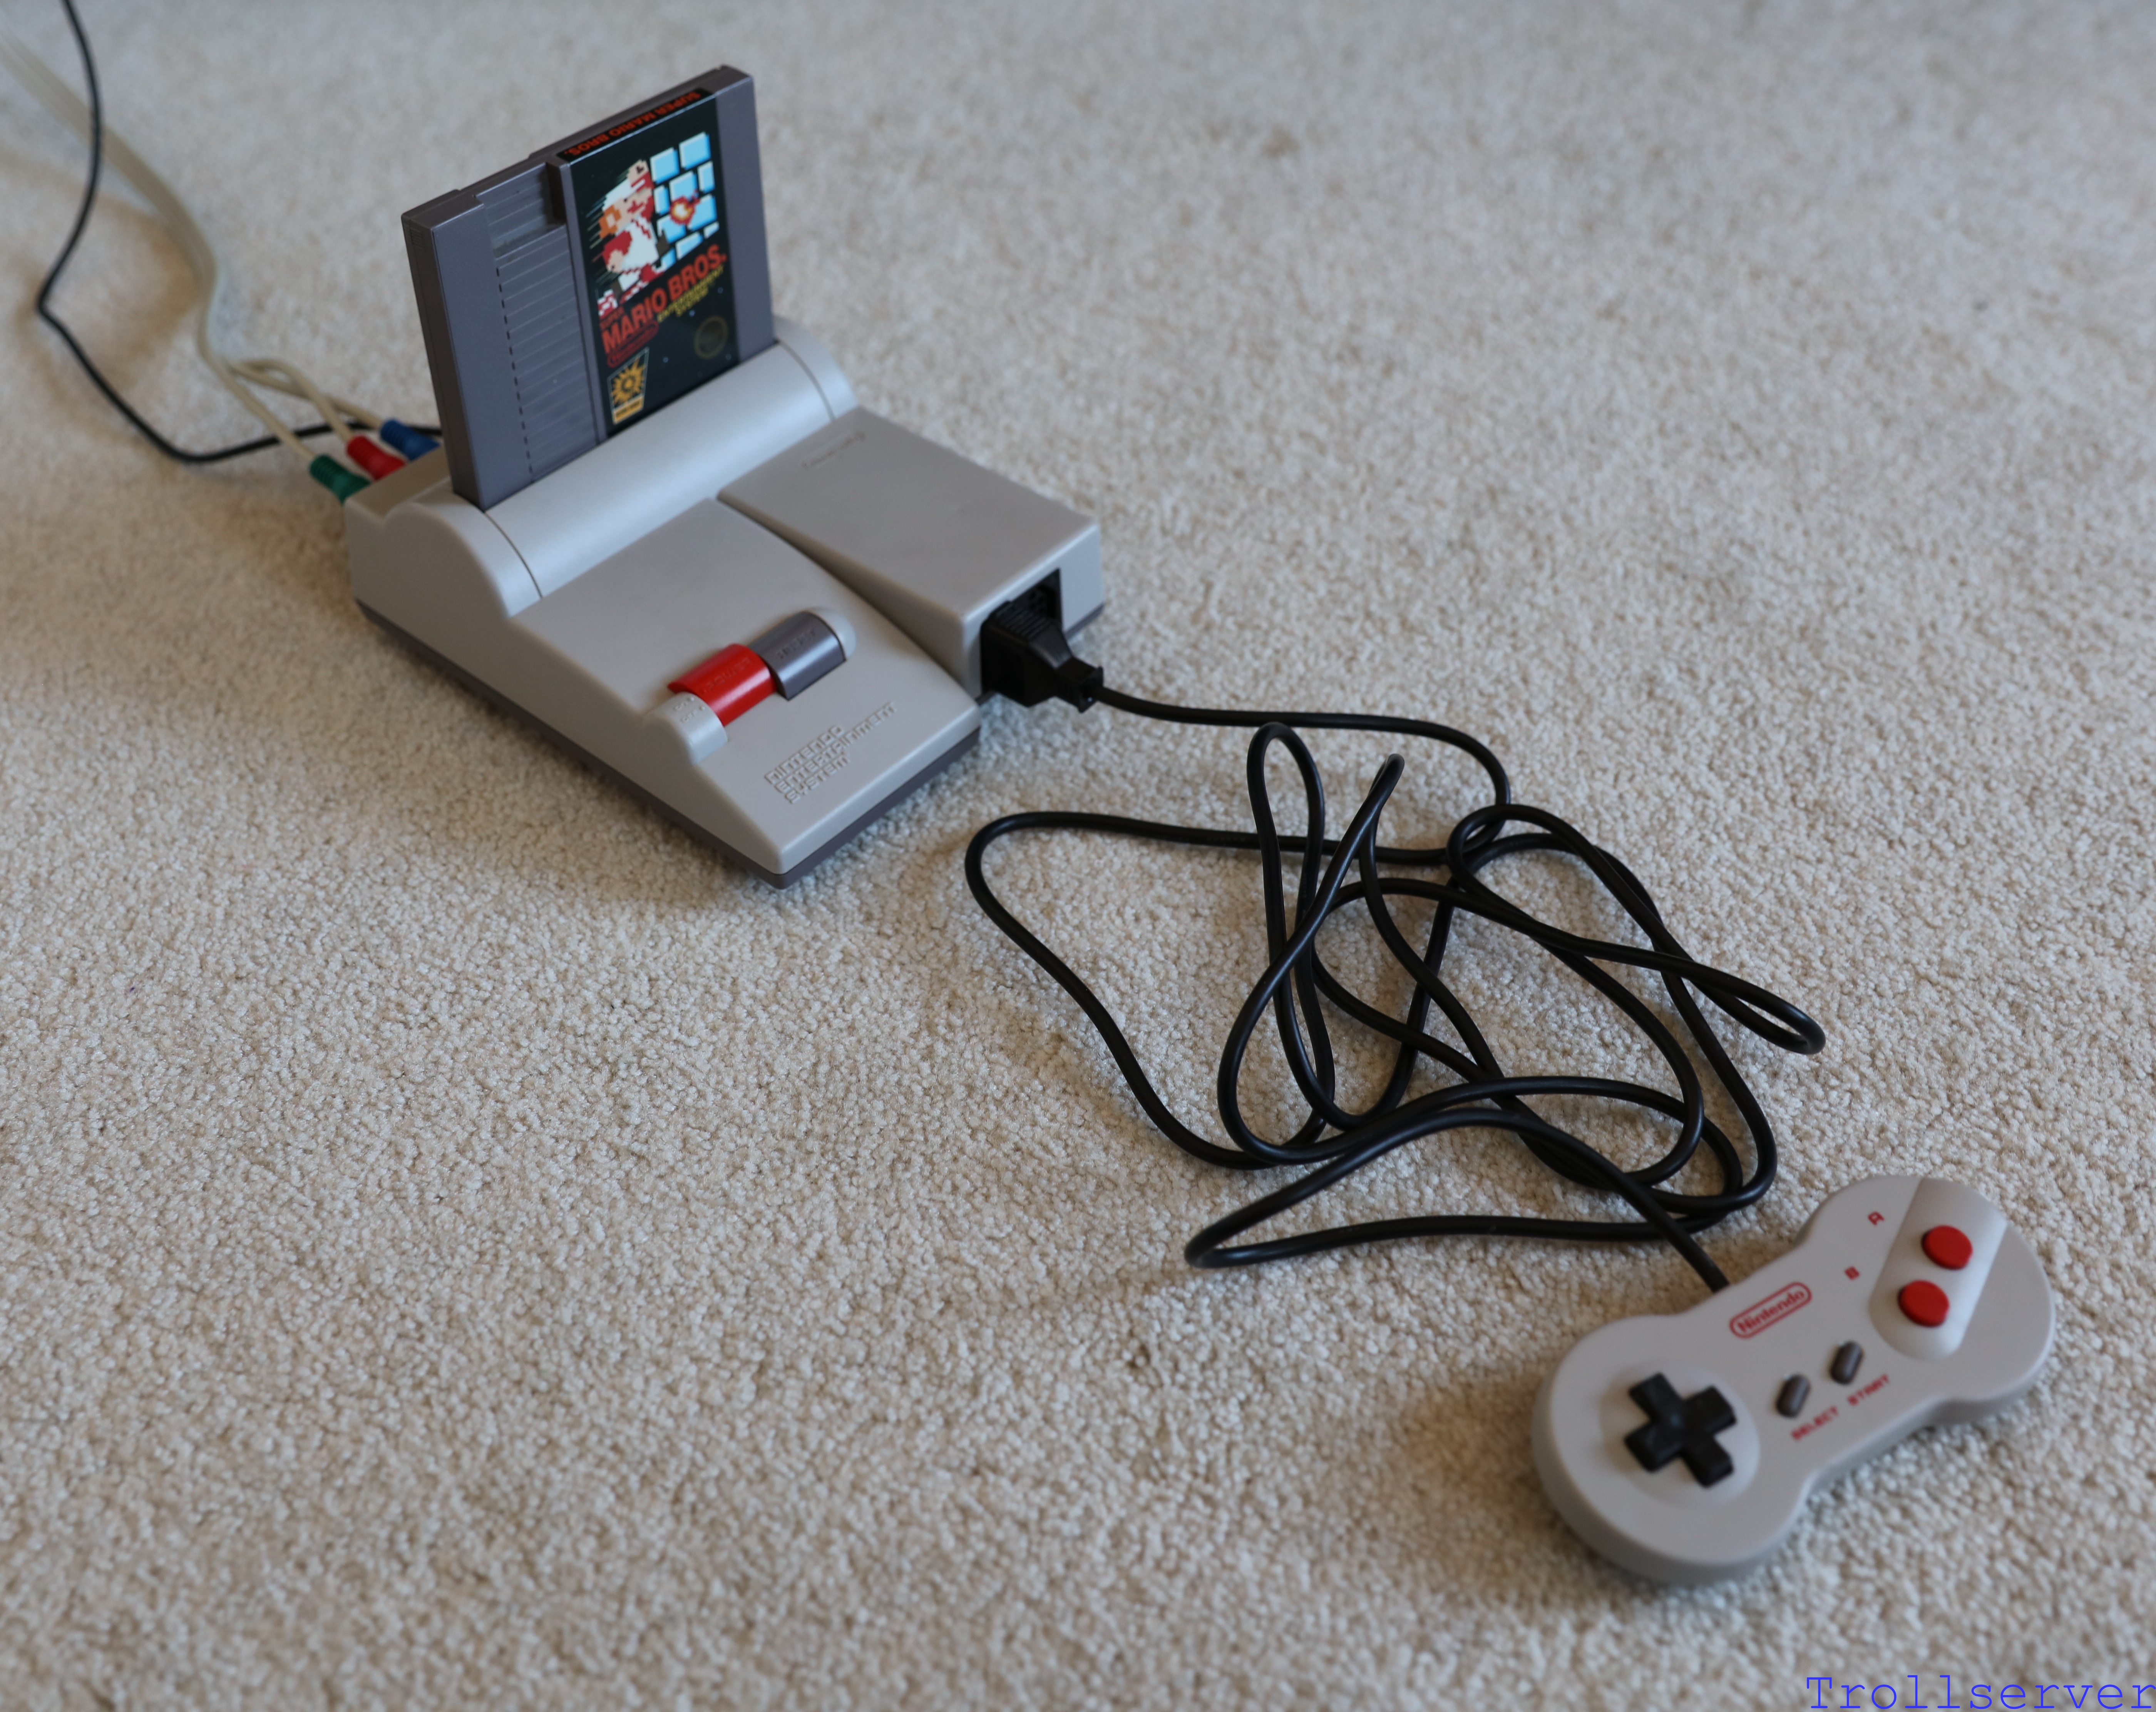
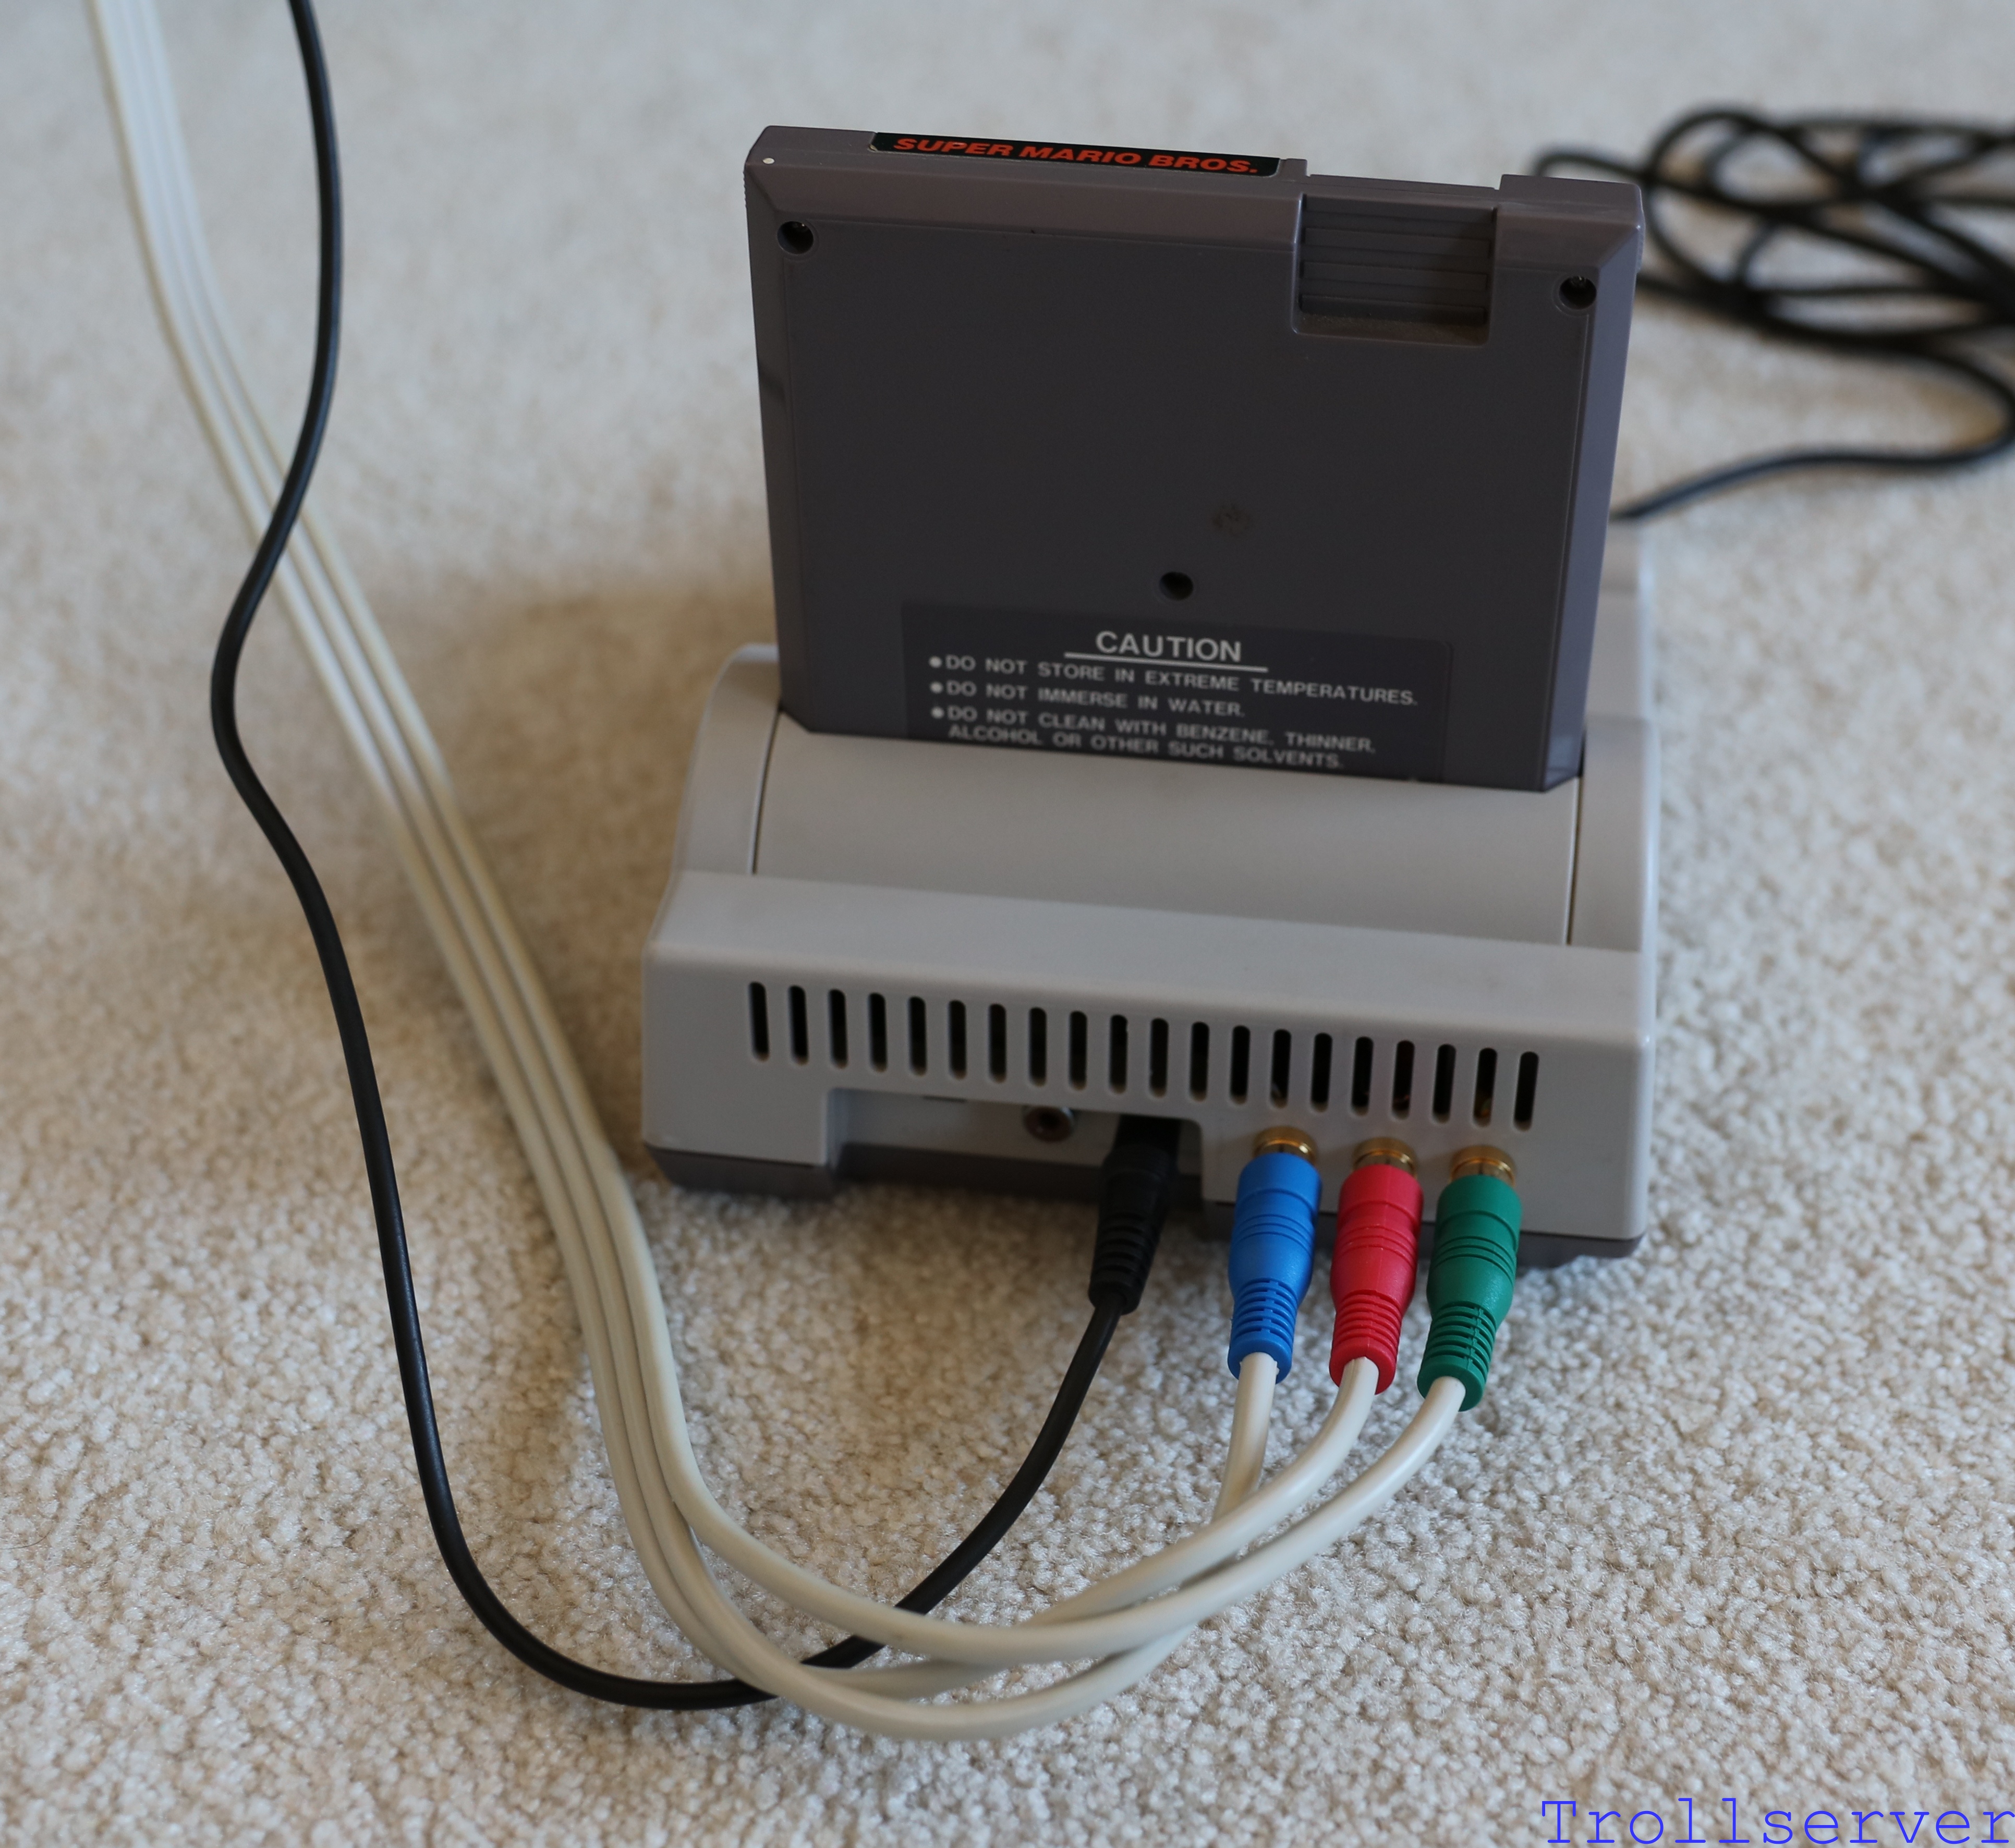
This is what it should look like all closed up again from the front and the back. Please note that your RCA jacks may have ended up in a different order, and that’s just fine. I mostly just like to make sure the two audio ones are next to each other instead of having the video in between them.
And from the back.
Congratulations! If you’ve gotten this far, you’ve completed the journey to a NES with improved graphics. Now go play that bad boy and enjoy it. The last post in this series is an output comparison. A bit of before and after because it seemed like the right thing to do.
To jump between posts in this series, please visit the NES Mod Index.